When it comes to practical, durable, and cost-effective roofing solutions, rubber roofing stands out as a popular choice for both homeowners and contractors. EPDM (Ethylene Propylene Diene Monomer) roofing, a type of rubber roofing, is especially favored for its flexibility and weather-resistant properties.
If you’re planning to tackle a roofing project yourself, this guide will walk you through everything you need to know about installing EPDM rubber roofing. By the end of this post, you’ll feel confident in your ability to install a durable, water-tight rubber roof—and you’ll likely save some money in the process.
What is Rubber Roofing?
Rubber roofing is a synthetic material made primarily from recycled rubber. It’s commonly available in the form of EPDM, a synthetic rubber material known for its long lifespan and durability. EPDM is often used for flat and low-slope roofs, making it ideal for residential projects like garages, sheds, or porches.
Why Choose EPDM Roofing?
- Durability: EPDM roofing can last up to 50 years with proper care.
- Weather Resistance: It stands up to extreme weather, UV rays, and fluctuating temperatures.
- Cost-effective: DIY EPDM installation is often more affordable than hiring a professional.
- Environmentally Friendly: Many rubber roofing materials are made from recycled materials and are recyclable at the end of their lifecycle.
See also: What is the Role of Toys in 6-Year-Old Boys’ Creativity
Tools and Materials You’ll Need
Before starting your EPDM roofing project, make sure you have the right tools and materials on-hand. Here’s a helpful checklist:
Tools:
- Tape measure
- Utility knife
- Broom or leaf blower
- Paint roller
- Rubber mallet
- Seam roller
Materials:
- EPDM rubber roofing membrane
- Adhesive or bonding glue
- Seam tape
- Roof deck primer
- Flashing tape (if needed)
Optional:
- Rubber roof cleaner (for maintenance post-installation)
Make sure you purchase high-quality materials, as the durability of your roof will depend on the quality of the products you choose!
Preparing for Your DIY Roofing Project
Step 1: Inspect the Roof Deck
Before you begin installing rubber roofing, assess the condition of the roof deck. Ensure it is:
- Clean and free of debris
- Smooth and even (repair any dips or bumps before proceeding)
- Dry to prevent adhesive issues
A sound roof deck is essential for the longevity of your EPDM roofing membrane.
Step 2: Measure and Plan
Measure the surface of your roof and calculate the amount of EPDM membrane you’ll need. Purchase extra material to account for overlaps and potential cutting errors.
Step 3: Choose Adhesives and Seam Materials
When shopping for adhesives, look for products compatible with EPDM. There are two types of adhesives:
- Water-based Adhesive for flat and low-slope roof applications.
- Contact Adhesive for areas with steeper angles or vertical surfaces.
Seam tape will also be required to secure overlaps in the EPDM membrane, ensuring a water-tight seal.
Installing Rubber Roofing
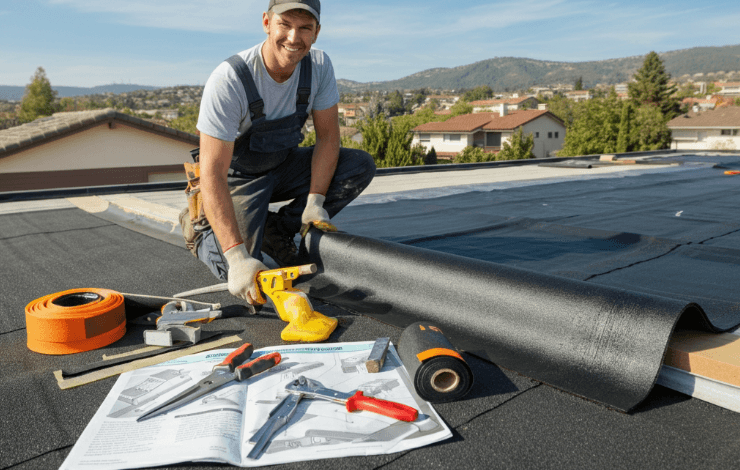
Step 1: Unroll and Cut the EPDM Membrane
Roll out the EPDM sheet over the roof and allow it to “relax” and flatten. This step minimizes wrinkles and stretching. Use a utility knife to carefully trim the membrane to fit your roof’s dimensions, ensuring a 3-6 inch overlap around the edges.
Step 2: Apply Adhesive
- Fold the EPDM membrane back halfway.
- Using a paint roller, evenly spread adhesive across the exposed roof deck. Be sure to follow the adhesive’s drying instructions to get the best results.
- Carefully lay the folded membrane back down, smoothing it over the adhesive as you go.
Repeat on the other side of the roof.
Step 3: Secure the Edges
Use seam tape to secure the overlaps along the edges of the EPDM membrane. Apply flashing tape to flashings, pipe vents, or other obstructions to prevent water penetration.
Step 4: Roll Out Seams
Using a seam roller or rubber mallet, press down on the seams to ensure firm adhesion and a water-tight seal.
Step 5: Inspect Your Work
Once the installation is complete, thoroughly inspect the roof for any gaps, wrinkles, or missed seals. Address any issues immediately to prevent potential leaks.
Maintenance and Care for Your Rubber Roofing
Maintaining your EPDM roof is critical to ensuring it lives up to its 50-year lifespan. Here are a few tips:
- Regular Cleaning: Clear leaves and debris using a broom or leaf blower.
- Check Seams and Edges: Inspect the seams and edges periodically to ensure the adhesive or seam tape remains intact.
- Repair as Needed: Keep rubber roof patches on hand to address any minor issues before they turn into larger problems.
Common Mistakes to Avoid
- Skipping Surface Preparation: Failing to clean and dry the roof deck can lead to adhesive failure.
- Not Allowing the Membrane to Relax: Wrinkles might form if you don’t allow the EPDM to settle before cutting.
- Using the Wrong Adhesive: Ensure your adhesive is made specifically for EPDM to avoid bonding issues.
Why DIY Rubber Roofing is Worth It
Installing EPDM rubber roofing as a DIY project might seem like a large undertaking, but the benefits often outweigh the challenges:
- Cost Savings: You can save a significant amount of money on installation fees.
- Accomplishment: Nothing beats the satisfaction of completing a project on your own.
- Tailored Results: You can take extra care to ensure the job meets your standards.
By completing your own EPDM roofing project, you gain a deeper understanding of your home while enjoying the durable, eco-friendly benefits of rubber roofing.
Take the Next Step in Your DIY Roofing Journey
Rubber roofing is a long-lasting, environmentally friendly solution for flat and low-slope roofs. With proper preparation and care, your EPDM roof will protect your property for decades to come.
If you’re ready to get started on your DIY roofing project, take the time to gather high-quality materials, plan carefully, and follow the steps outlined in this guide. With a little effort, you’ll be well on your way to a durable and efficient rubber roof.